The Etch-a-Sketch is a classic toy, in which two knobs are used to independently control the horizontal and vertical movement of a pointed, which removes a dust coating from a plastic screen, leaving a semi-permentant trace. What if we attach stepper motors to the knobs and control them by computer, instead of by hand? There's several possible applications; one particularly well-suited to the Etch-a-Sketch is generative art based upon Lindenmeyer systems. These are often continuous, connected lines (the Etch-a-Sketch can not lift its pen up and down) and describe interesting patterns such as fractals and plant shapes.
This is fun, and also illustrates the principles behind automated production tools like CNC machines, laser cutters, and 3D printers.
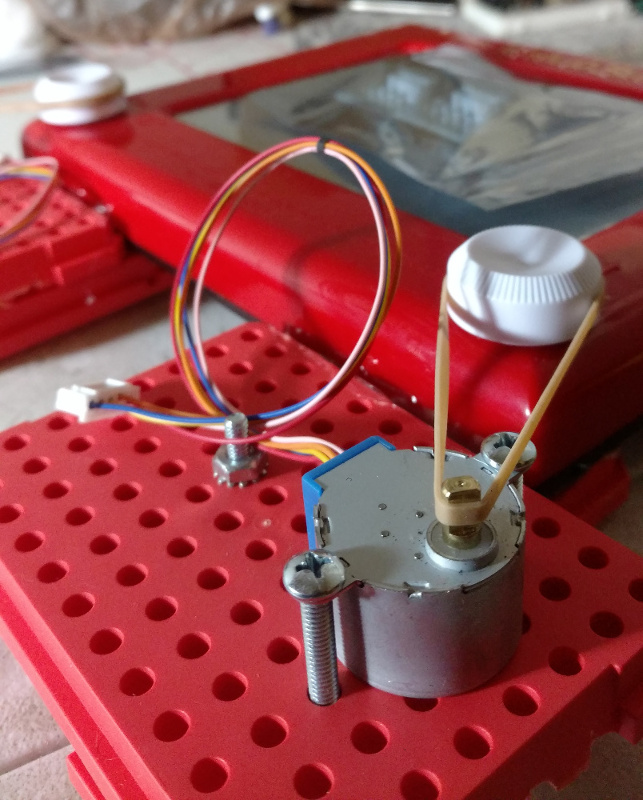
Right now, the dials are controlled by 28BYJ-48 stepper motors and the standard driver library. Rubber bands worked pretty well as drive belts, but they were too elastic to transmit fine changes and tended to slip on the smooth posts of the toy. An alternative scheme uses gears instead and has the advantage that the ratio of motor turns to dial turns can be adjusted. These gears were designed in openSCAD using this gear generating library, and 3D printed at UNC-BEAM:
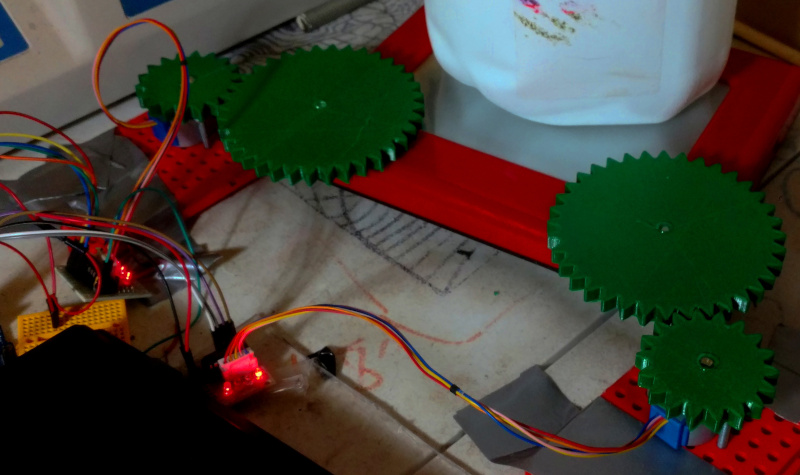
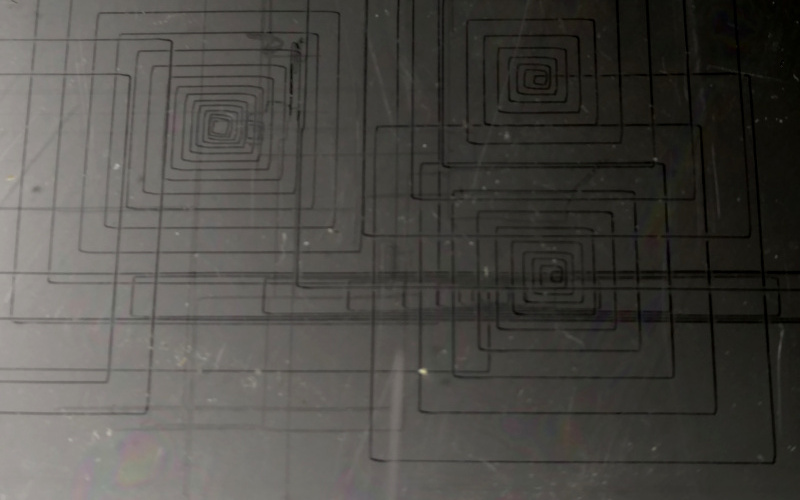
The gears probably need to be redesigned with smaller radii and finer teeth, but this set up is working well enough to test out some basic routines. for example, this loop draws horizontal and vertical lines alternately. With each pass of the loop, the size of each line drawn is scaled up by a factor of 1.1; the sign, corresponding to the direction of travel, is also reversed.
void setup(){
  hSteps  = STEPS_PER_OUTPUT_REVOLUTION / 2 ;
  vSteps  = STEPS_PER_OUTPUT_REVOLUTION / 2;
  horiz_stepper.setSpeed(500);
  vert_stepper.setSpeed(500);
}

void loop(){
  horiz_stepper.step(hSteps);
  hSteps *= -1.1;
  vert_stepper.step(vSteps);
  vSteps *= -1.1;
}
Since each line segment starts where the last one ends, this draws a spiral expanding outwards. Varying the scaling of the two line sizes can create a variety of patterns. Setting different (negative) scaling rates for the horizontal and vertical will give rectanglular spirals with different aspect ratios. If the scaling rates are between -1 and 0 exclusive, the spiral will contract inward rather than expand outwards. If one of the rates is positive, a square-wave pattern will be produced; if both are positive, it will produce a staircase.
Here's a few similar projects:
